Thursday, December 15, 2011

First Christmases


I will never forget my first Christmas as a mother.  It was full of the usual poignant moments, the handmade Christmas dress, the "First Christmas" ornament.  But it was the most ordinary task in the middle of all that celebration that became the greatest memory, because in the middle of it, I was so profoundly struck by what that First First Christmas was.

Of all the elements and activities of the season, my epiphany came while I was changing my baby's diaper.

Wiping her little bottom, it hit me like lightening what it really meant when Christ came as a baby.

Not as a shiny, giant, glowing God who is instantly feared for His power.


Not as a grown man who one day showed up in town, offering parables, miracles and grace.


Not as a verbal child, able to make himself understood.


He came as a baby.  A human baby, the most helpless creature on earth.


The Creator of this...


the Provider of this...


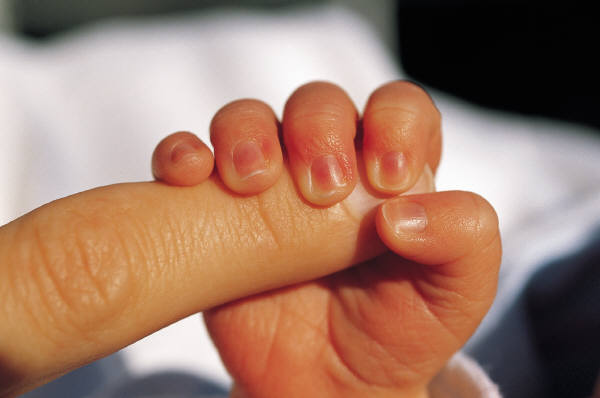
came as a baby who had to cry for food...


a baby who couldn't control his own body and soiled his diapers, sitting in it until someone noticed and could take time to change him.


He chose humility on an unimaginable scale so that He could not only be my sacrifice, but understand my daily struggles, great and small. To know what it was to be a puny human.


That's love. A love so far beyond anything language could explain that it required such abject humility and sacrifice to express it.

A love for me. A love for you. Love given despite His knowing what we would be and how little we would deserve it.

So as you purchase and wrap the Christmas gifts for those you love, and as you open their gifts to you in turn, I hope each piece of tape and ripped paper reminds you of that First Christmas gift: a love for you so wide and broad and high and deep, it can barely be comprehended.


Linked up to Serenity Now's Weekend Bloggy Reading. Stop by for more inspiration and ideas from all over the blogosphere.

Tuesday, December 13, 2011

The Bread So Fabulous, It Spawned a Family Tradition

If you are Scandinavian and celebrate St. Lucia Day, be warned: We have a very skewed celebratory tradition for this day. We do it completely wrong. We know. And I'm great with it.

Mr. Hat's maternal grandfather was Swedish, despite the family hailing from Finland as far back as I can go. Still, by the time Mr. Hat was around, there was no familial observation of St. Lucia day, a major Scandinavian holiday; as far as I know, it wasn't something his mother celebrated while growing up either.


As an adoptive mother, I can't pass along genetics. But I can pass on the traditions and cultures associated with our genes. This desire serendipitously collided with a recipe I found in a magazine for an amazing "St. Lucia Bread" I HAD to try. Hello, orange infusion? Orange glaze? Homemade bread? Um, yah. We've got Swedes in our house, so why not celebrate this holiday? At the time, I knew no one Swedish who celebrated St. Lucia Day to show me how it was done.

I was on my own, wanting that bread.


I began by learning about the day's honoree: St. Lucia. She is said to have brought food and comfort to the poor and/or Christians hidden in the dark catacombs (depending on the version of the story you read). Her hands laden with provisions, she needed a hands-free way to light her path. Adding some lighted candles to her braided, coroneted hair, she entered the dark warrens looking like the angel she was.


And so began our tradition: gathering around our braided, lighted bread in the evening of each December 13, to reflect on how fortunate we are and plan how we will give to those less fortunate as St. Lucia did, donating toys for Toys for Tots, contributing to food pantries, gathering new mittens or scarves for the homeless, etc. Though money is tight, often painfully tight, for us, we are still so, so fortunate and I want my kids to realize it.


Now that my kids are older, I wanted our giving to be more sacrificial on their part. So this year, we sat around our bread and I told them my plan (which I'll confess has some benefit for me, too). There are a bazillion things on my "to-do" list to prepare our house for hosting Christmas this year. And I have three little hooligans who need something to do for the week of break preceding Christmas. So they'll be giving sweat equity: each task will have a penny value assigned, one cent for minor tasks and more for more difficult or time-consuming tasks. When the task is completed, the assigned number of pennies will be put in a jar. At the end of the week, we'll convert those pennies to dollars that we'll donate to a local homeless shelter. Our children, having no money to give, will give of themselves, working and denying themselves the pleasure of spacing out in front of the television or Wii time.


So, you see it isn't how one is supposed to celebrate the day. But it's the way we do it, and it tastes sweet all the way around.

Saturday, December 3, 2011

New Vintage Bottlebrush Trees

I love those vintage bottle-brush trees in white and pastels. They're classic, nostalgic Christmas goodness. They're also hard to find, and even harder to afford in a quantity you can do something with.


Which is why I was thrilled to find on Pinterest some magic performed by The Crafty Minx. She took the readily available and far cheaper green, flocked trees and bleached them! I loved that they weren't the stark white that most new ones are, sporting a creamy vintage look instead.

I found a big bag of trees in assorted sizes (about a dozen and a half) at the Home Depot for $7 and determined to try this myself.

I won't reinvent her tutorial. But I will share how I deviated:
1) I didn't use gloves. I wish I had. But if you want a chemical peel on your hands, skip the gloves and you'll experience pretty much the same thing.
2) I just used a big glass bowl instead of a plastic tub, since I had a bowl and not a tub, and did them a few at a time.
3) I found both mildly diluted bleach and straight bleach worked fine and took about the same amount of time.
4) I didn't scrub and I didn't soap/water wash. I just soaked and then rinsed thoroughly. I scrubbed and soaped the first one and thought it too abusive. Because I didn't beat the bejeebers out of them, some of the flocking did remain, and I liked that look, too.
5) It took a lot longer than the five minutes she cited to achieve the right color.  More like 20 minutes. But I used house-brand bleach, so maybe the "good stuff" would act faster.
6) I opted to glitter and not dye (see Crafy Minx's tutorial if you want to dye). I think it'd be worth trying to leave them white with colored glitter, too. But for this batch, I used a white-ish iridescent glitter.


To "glitterfy" your dried trees:
1) Set your sound system to play Christmas music. Is there anything better than Michael BublĂ© and glitter? Thought not.
2) Cover your work surface. Consider donning an apron to protect yourself from glue spatter.
3) Gather materials:
  • Adhesive. A white, clear-drying glue like Elmers or ModPodge. I had ModPodge on hand, so that's what I used. Pour some in a small bowl or measuring cup and thin with a little water. You want to prevent crushing the fine fibers with thick glue. Alternately, you probably could use a spray adhesive; just make sure you have good ventilation, protect surfaces and tree base from over-spray, and tape your base to a surface to prevent the propellant from blowing these lightweight trees over.
  • A paintbrush. I used an old paintbrush I had laying around from a recent paint project. A medium artist brush would probably work fine; the little ones like those that come with your kids' watercolors is probably too small.
  • A bowl for excess glitter.
  • Glitter. I got my iridescent glitter at Hobby Lobby a few years ago.


4) Dip your brush into the thinned glue and dab onto your tree, using a stippling action at a slight angle, from bottom to tip.


5) Clean ModPodge off your camera. *sigh*
6) Once you have the glue all over the tree, hold the tree over your bowl and sprinkle with glitter.

I have a whole new appreciation for photo tutorials.
Do you know how hard it is to craft with one hand and photograph with the other?
7) Shake off excess and set tree aside to dry.
8) When done, make sure you clean your brush, glue bowl and anything else with the glue on it right away. ModPodge is used to seal and adhere materials to surfaces permanently; you don't want that hanging out in your brush.

Let your trees dry - done!

Epsom salt, by the way, makes perfect snow. And post-holiday, you can soak in it and relieve all that holiday stress.


Thursday, December 1, 2011

Merry Christmas to Me!

Several years ago, when we lived in Nashville, I found this exquisite armoire at a flea market. It had all its interior compartments intact with little glass-doored, labeled cubbies for folded items. And it was priced for a steal. For reasons I can't recall, I debated and ended up walking away, still regretting it after 17 years.

So, you'd think a girl would learn, right? Apparently not.

Yesterday, I had 15 minutes to kill between an errand and picking up my daughter at school; it wasn't enough time to head home, but it was too long to sit and wait at school.  So I hopped over to our local Goodwill store.

Which is when I found a set of china that I'd admired on a blog just a few weeks ago.  Thirty-five pieces of Homer Laughlin Chateau in pristine condition. $500 or so worth of gorgeous china for a mere $15. The square salad plates alone are sold online for around $40 each, and there are 10 of them. Seems a no brainer, doesn't it? But no, I walked away! I didn't need it. I don't know where I'd put it. But I loved it. Passionately. And I would use it. So the thought of it haunted me all evening, as did the memory of that armoire.


Mr. Hat pointed out that it was exactly the amount remaining for him to spend for my Christmas gifts. So I wished me a merry Christmas and decided I'd head over there first thing, praying no one else snapped it up in the meantime.

Sure enough - they were still there! And now they aren't. Now they're at my house, looking lovely and making me giddy happy.


All 11 dinner plates, 10 square salad plates, 9 bread & butters, 4 soup bowls, 1 precious berry bowl.


Suddenly, I know exactly how I'm setting my table for Christmas this year.  Looks good with my newly vintaged bottle-brush trees, no? (Would you believe this tree started out as one of those green ones you see with ceramic villages and train sets? True. And I have an army of them.)


So, thanks "Santa!" You did swell.