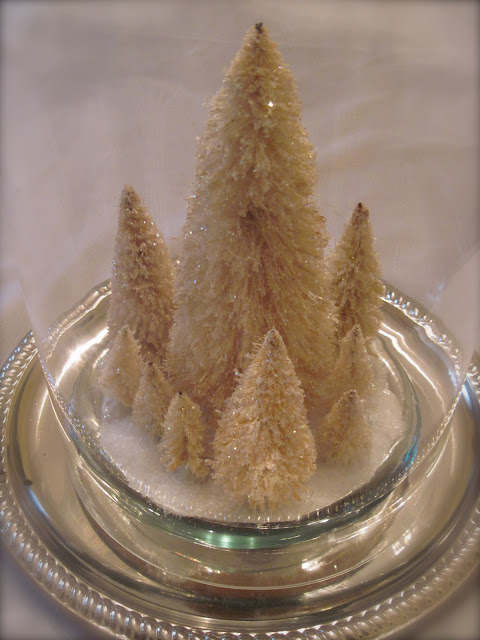
Which is why I was thrilled to find on Pinterest some magic performed by The Crafty Minx. She took the readily available and far cheaper green, flocked trees and bleached them! I loved that they weren't the stark white that most new ones are, sporting a creamy vintage look instead.
I found a big bag of trees in assorted sizes (about a dozen and a half) at the Home Depot for $7 and determined to try this myself.
I won't reinvent her tutorial. But I will share how I deviated:
1) I didn't use gloves. I wish I had. But if you want a chemical peel on your hands, skip the gloves and you'll experience pretty much the same thing.
2) I just used a big glass bowl instead of a plastic tub, since I had a bowl and not a tub, and did them a few at a time.
3) I found both mildly diluted bleach and straight bleach worked fine and took about the same amount of time.
4) I didn't scrub and I didn't soap/water wash. I just soaked and then rinsed thoroughly. I scrubbed and soaped the first one and thought it too abusive. Because I didn't beat the bejeebers out of them, some of the flocking did remain, and I liked that look, too.
5) It took a lot longer than the five minutes she cited to achieve the right color. More like 20 minutes. But I used house-brand bleach, so maybe the "good stuff" would act faster.
6) I opted to glitter and not dye (see Crafy Minx's tutorial if you want to dye). I think it'd be worth trying to leave them white with colored glitter, too. But for this batch, I used a white-ish iridescent glitter.
To "glitterfy" your dried trees:
1) Set your sound system to play Christmas music. Is there anything better than Michael Bublé and glitter? Thought not.
2) Cover your work surface. Consider donning an apron to protect yourself from glue spatter.
3) Gather materials:
- Adhesive. A white, clear-drying glue like Elmers or ModPodge. I had ModPodge on hand, so that's what I used. Pour some in a small bowl or measuring cup and thin with a little water. You want to prevent crushing the fine fibers with thick glue. Alternately, you probably could use a spray adhesive; just make sure you have good ventilation, protect surfaces and tree base from over-spray, and tape your base to a surface to prevent the propellant from blowing these lightweight trees over.
- A paintbrush. I used an old paintbrush I had laying around from a recent paint project. A medium artist brush would probably work fine; the little ones like those that come with your kids' watercolors is probably too small.
- A bowl for excess glitter.
- Glitter. I got my iridescent glitter at Hobby Lobby a few years ago.
4) Dip your brush into the thinned glue and dab onto your tree, using a stippling action at a slight angle, from bottom to tip.
5) Clean ModPodge off your camera. *sigh*
6) Once you have the glue all over the tree, hold the tree over your bowl and sprinkle with glitter.
 |
| I have a whole new appreciation for photo tutorials. Do you know how hard it is to craft with one hand and photograph with the other? |
8) When done, make sure you clean your brush, glue bowl and anything else with the glue on it right away. ModPodge is used to seal and adhere materials to surfaces permanently; you don't want that hanging out in your brush.
Let your trees dry - done!
Epsom salt, by the way, makes perfect snow. And post-holiday, you can soak in it and relieve all that holiday stress.


I'm so impressed with this and thanks for the tutorial. :)
ReplyDeleteThanks for posting this! When you mentioned these in your dishes post, I wondered how you made them. Can't wait to try it this week.
ReplyDeleteThese are just lovely. I don't think you need to change a thing.
ReplyDeleteThank you for your hints and tips.